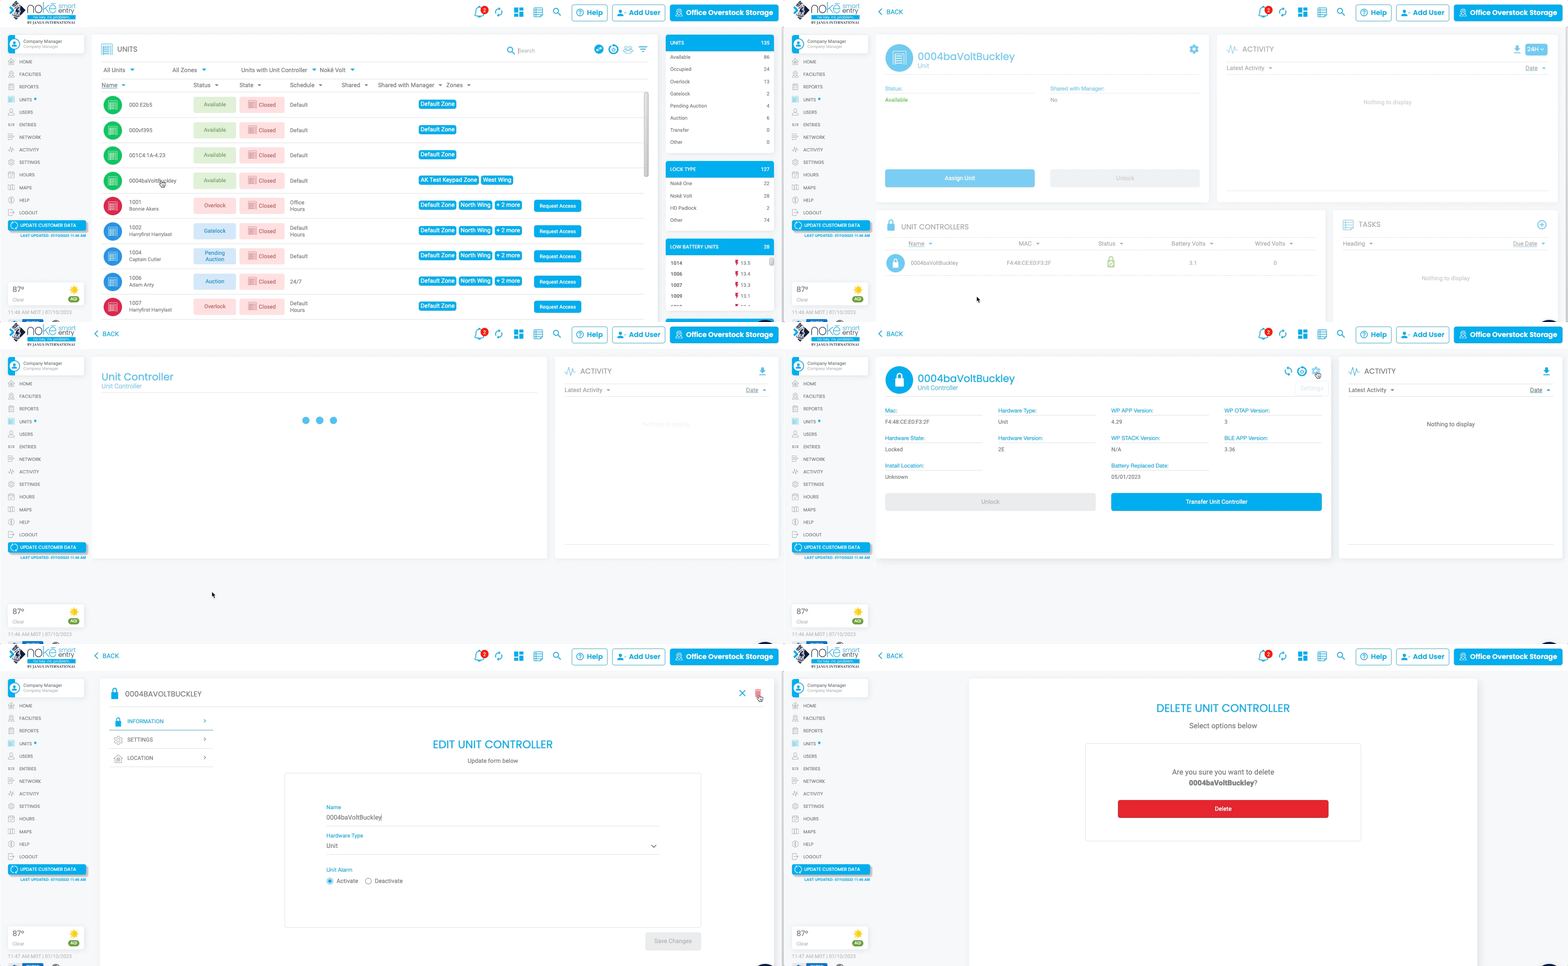
Steps to Remove Unit Controllers via the Mobile App or Web Portal
Deleting a Unit Controller from a Unit
Unit controllers can be removed from a unit through both the Nokē Smart Entry Mobile App and the Web Portal. This process can be useful when you need to reassign a unit controller or remove it from a unit.
To Remove a Unit Controller from an Existing Unit via the Mobile App:
- Log in to the Nokē Smart Entry Mobile App.
- Tap the Units icon (second from the left).
- Locate the unit you wish to remove the unit controller from by scrolling or using the search function, then tap on the unit.

- On the Entry screen, tap Unit Controllers.

- Select the unit's unit controller.

- Scroll to the bottom of the screen and tap Delete.

To Remove a Unit Controller from an Existing Unit via the Web Portal:
- Log in to the Nokē Smart Entry Web Portal.
- Click on the Units tab in the navigation menu.
- Scroll or search to find the unit from which you want to remove the unit controller, and click on it.
- Click on the unit's Unit Controller.
- Click Settings.
- Tap the Trash icon and select Delete.

Once deleted, the unit controller will no longer be associated with the unit.
Permission Needed
- Manage Locks
If you do not have the correct access, contact an administrator to add that permission to your role type.
For more information, click below:
.png?height=120&name=noke_vertical%20(1).png)