How to manage Activity Views for quick access.
Managing Saved Activity Views
The Manage Views feature in the Web Portal allows you to save your frequently used Activity filters for quick access. This functionality makes it easy to customize and switch between views tailored to your specific needs.
Creating a Saved Activity View
-
Access the Activity Page:
- From the Web Portal, navigate to the Activity page.
-
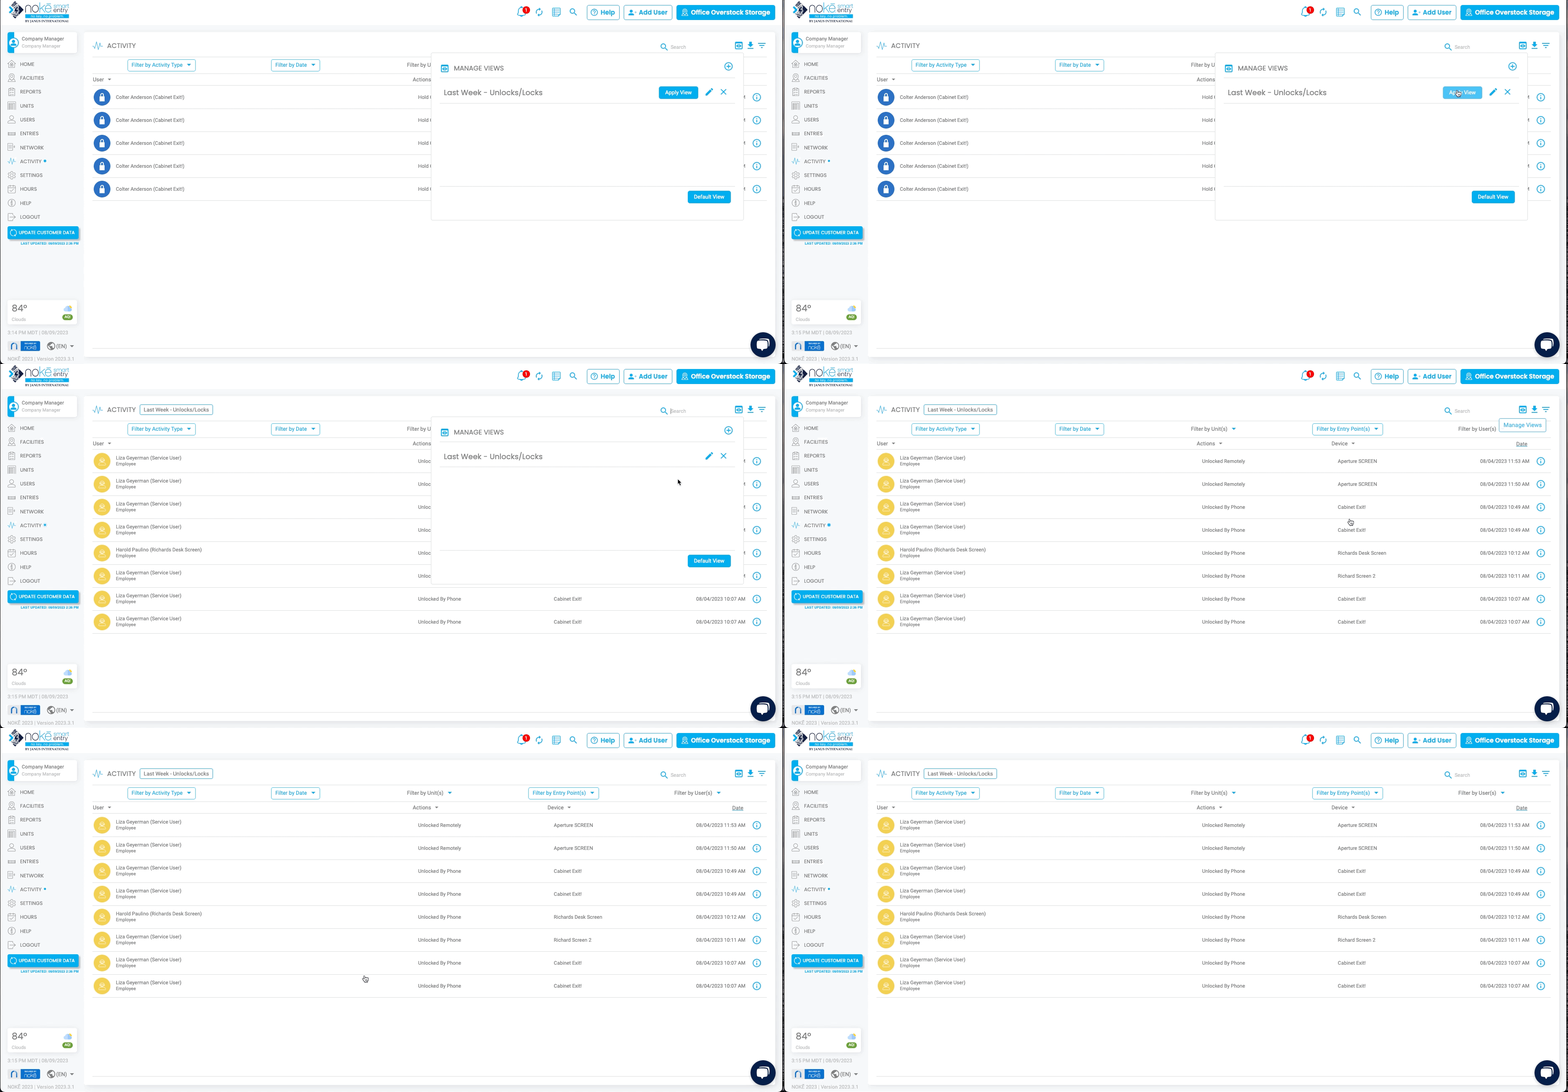
Open Manage Views:
- Click the Manage Views icon.

- Click the Manage Views icon.
-
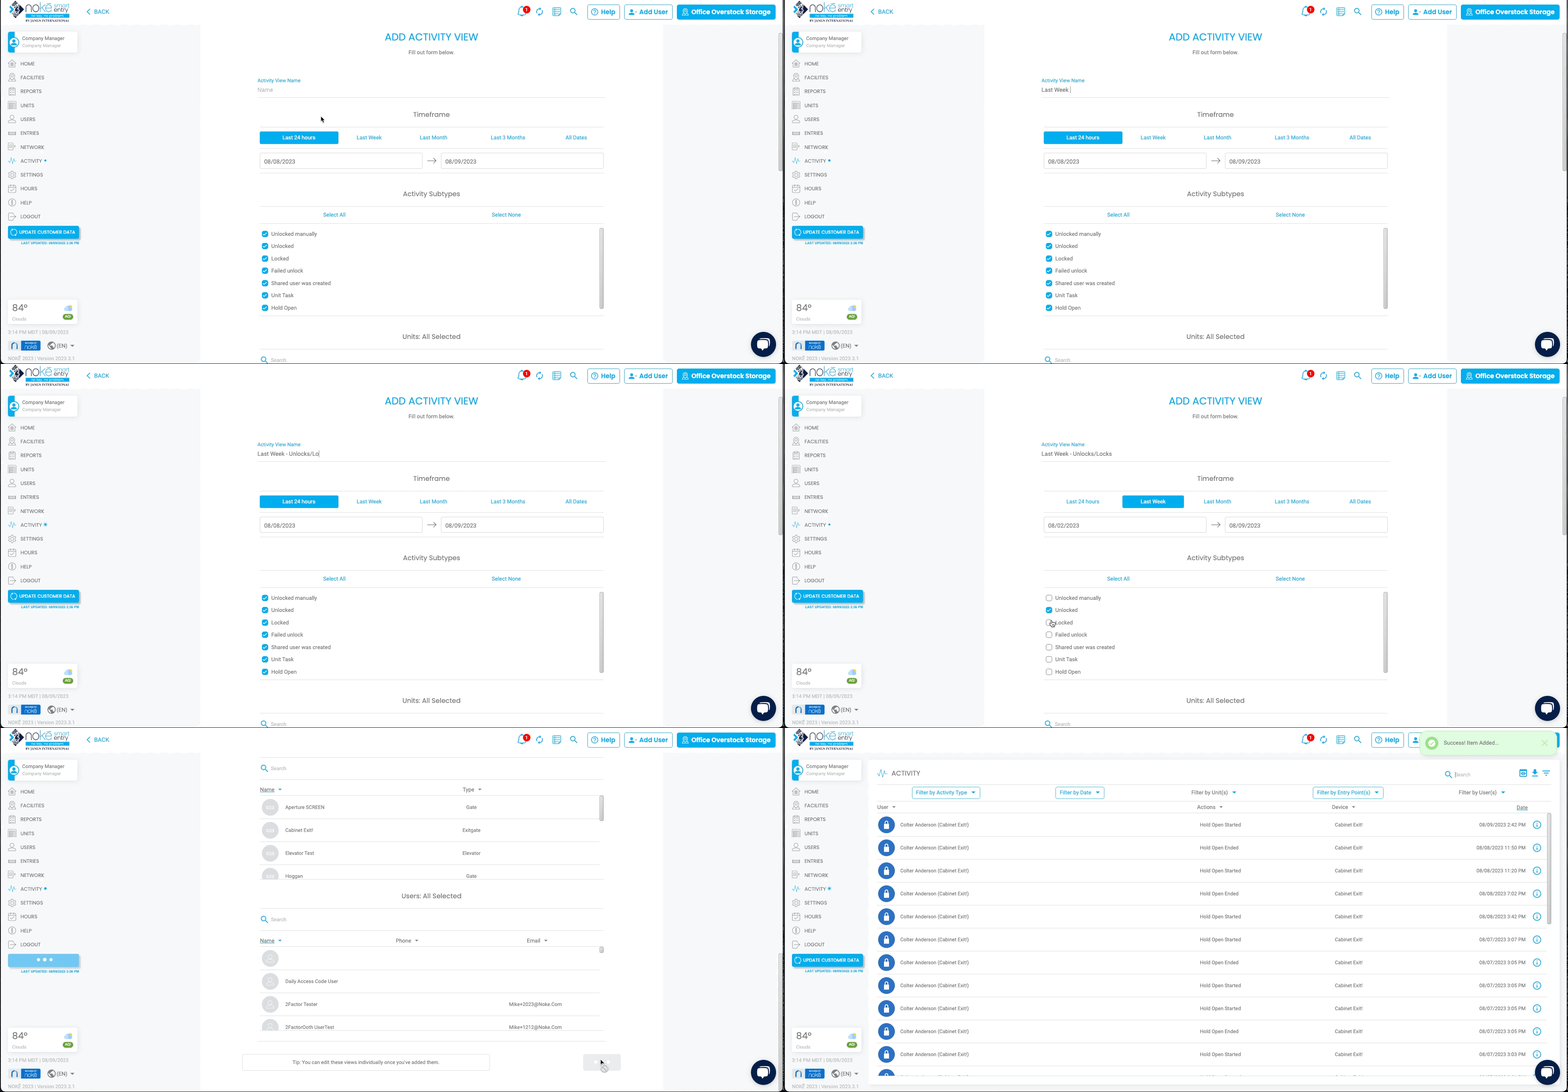
Add a New View:
- If this is your first view, click Add Activity View. Otherwise, click the + (plus) icon in the top-right corner.


- If this is your first view, click Add Activity View. Otherwise, click the + (plus) icon in the top-right corner.
-
Configure Your View:
- Complete the form by:
- Assigning a name to the view.
- Selecting the desired filters and settings to include in this view.
- Complete the form by:
-
 Save Your View:
- After entering all the necessary information, click Save.
-
Apply a View:
- To apply a saved view, click the Manage Views icon and select Apply View from the list of available views.

- To apply a saved view, click the Manage Views icon and select Apply View from the list of available views.
Removing an Activity View
-
Access Manage Views:
- Navigate to the Activity page and click the Manage Views icon.

- Navigate to the Activity page and click the Manage Views icon.
-
Remove a View:
- Select the Activity View you want to remove, and then click Default View to reset the page to its original state.

- Select the Activity View you want to remove, and then click Default View to reset the page to its original state.
Tips for Efficient Management
- Create multiple Activity Views to cover different reporting or management needs.
- Use descriptive names for each view to easily identify its purpose.
This feature simplifies facility management by providing quick access to your customized activity filters.
Permission Needed
- View User Activity
If you do not have the correct access, contact an administrator to add permission to your role type.
For more information, click below:
Reviewing the Activity Overview and Recent Activity Widgets
.png?height=120&name=noke_vertical%20(1).png)